


In order to help resin 3D printing newbies jump into 3D printing easily, we launched the Get Start in Resin Printing campaign on our Social media platforms this Aug. Help people learn how to get into the resin printing process properly. As the campaign goes to an end, we organized these tutorials below and hope they can help resin 3D printing beginners!
[#GetStarted in Resin Printing①]

To start resin 3d printing, it's necessary to gather the materials and protective tools beforehand. We've listed the basic items before you start printing.
-
Working space: Select a place with good ventilation and light (avoid UV rays) as your workspace. Better learn the printer's dimensions in advance to leave enough space for the printer. And be sure to get a stable, level surface to place the machine.
-
Material: Choose the resin that can work with your preferred resin printer. (NOTE: The ELEGOO resin printer uses UV light with a wavelength of 405nm, so the resin need to meet this requirement). There are a variety of resins, such as high-resolution resins, rapid resins, general-use resins, and others for specific applications. How to choose the suitable resin?
-
Slicing software: Slicing software is a must-have, you could consider Chitubox Slicer, VoxelDance Tango Slicer, Lychee Slicer, and other slicing software. After model slicing, copy the file into the USB disk(or send by Networking function) then start printing on the 3d printer.
-
Protective equipment: Protective tools must be worn when using the resin during the printing process since resins often contain chemicals and they can be harmful if not handled properly. Wearing Nitrile gloves, protective masks, safety goggles, and aprons will help avoid direct contact between resin and skin and minimize the risk of potential hazards.
[#GetStarted in Resin Printing②]

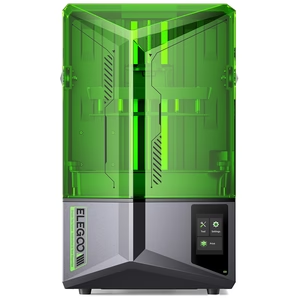
Next we will guide you through the process of setting up a resin 3D printer for the first time.
-
Assembly:
Unpack the printer components and follow the manufacturer's manual book or Youtube assembly tutorial(ELEGOO's YouTube channel will list the printer's assembly tutorials) to assemble the machine. Ensure all the parts are included in the pack. It is very easy, typically involving attaching the build platform, resin vat, and ensuring all parts are securely fastened. If the build plate is loose, use the wrenches to tighten it. Don't forget to remove the protective plastic films on the LCD screen or build plate.
(Here is an ELEGOO machine unboxing tutorial for your reference: https://youtu.be/YCdx9yhda_4)
-
Level the Bed:
Leveling the build platform is essential for ensuring consistent layer height across the entire printing area. Check the instructions on the manual book or the assembly video, which usually include adjusting the leveling screws or nuts using the calibration tools, like the hex wrench(Allen Key) ensuring it is parallel to the LCD screen.
-
Exposure Test:
Performing a screen exposure test is critical before printing. Light source working status will determine the printing results directly. Activate the exposure test process as per the manufacturer's instructions, and ensure the light source is evenly focused on the LCD screen.
-
Resin Tank Preparation:
Clean the resin vat thoroughly to remove any dust or residue. Ensure that the bottom surface is clean. Wear gloves and pour the resin into the vat, making sure not to overfill it(do not cover the MAX line on the tank). Be sure to follow the manufacturer's guidelines regarding resin type, quantity, and usage.
Check the recommended ELEGOO resin settings: https://tinyurl.com/33nymm8b
[#GetStarted in Resin Printing③]

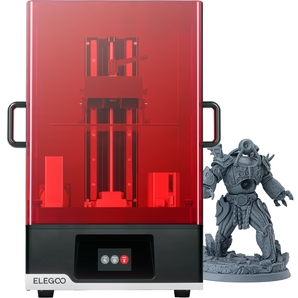
How to well handle your resin models after printing? Hope the guide below will help you.
● Part 1: Model & Supports removing
After printing is done, the first step will be removing the model(from the build plate) and supports.
-
Remove the model from the build plate: Place the build plate at an angle in a plate with a flat surface, and use the metal or rubber spatula to remove the model by slowly separating the two where the model/supports and the build plate are in contact.
-
Remove the supports: Wear gloves, you can slowly remove the supports on the model with the help of the cutting plier in the tool kit.
-
Sanding: Regarding the pits on the model surface, sandpaper can be used to keep the surface smooth. Follow the texture of the sandpaper from coarse to fine to sand the support points, so as to ensure the fineness of the surface. Slowly to avoid having large scratches.
After the printing is done, the model will need to be thoroughly cleaned, washed, and other post-processing. Keep reading to learn some ways of washing and curing.
● Part 2: Washing and Curing
[Washing method:]
Step 1: Fill a washing bucket using 95%(or higher) IPA.
Step 2: Rinse the printed object in isopropyl alcohol to remove the excess resin. Wash the model in the bucket for about 2~3 minute. For some corners, you can use a cleaning bottle with a long tube to rinse them accordingly. If the model still feels sticky to the touch, it's necessary to continue to clean until its surface remains dry and non-sticky. (You can always use a brush to clean the corners of the model.)
Another way is to apply a washing machine like the ELEGOO Mercury Plus 2.0 machine, which can help you clean the models faster and more efficiently. Check more: https://tinyurl.com/yc4tdjhs
Step 3: Once cleaning is done, put the model in a cool place for air-drying (about half an hour is enough). You can also use a compressed air gun to speed up the process.
Step 4: After the model is dry, conduct the curing process. (Be sure to completely dry the model before curing, otherwise white impurities may appear on the model.)
[Curing method:]
Cure the object using UV light, by using a UV curing box. You can use a UV lamp with a wavelength of 405nm to irradiate the model for curing. The curing time should vary based on the model size, structures and more factors.
Note: Be careful to protect your eyes during use.
If there is no proper UV lamp, the ELEGOO Mercury Plus 2.0 wash and cure all-in-one machine combines cleaning and curing functions in one, helping you to clean and cure your models faster and more efficiently. It's equipped with a curing cover that can help block UV lights in curing.
Should you have many models that need to be washed and cured, the ELEGOO Mercury XS Bundle wash and cure ensures that your models can be cleaned and cured at the same time, greatly improving the efficiency of model post-processing. In addition, the machine is equipped with a handheld UV light, which helps to better cure the model in more hidden locations and inside the model.


